While there are plenty of Chef tutorials out there I still found myself hunting around for one or two things when setting up my environment so I decided to write this article… Well, it is also for my own selfish reasons as writing these doc’s help to ensure that I learn and provide a reference when I need to set things up again.
So! I have been getting started with Chef for configuration management and after building a local server or using Opscode hosted chef you will need to setup your workstation for knife and create a repository to store your configurations.
Repository Setup
To get started we are going to clone the base repository provided by Opscode and then mirror it to our local git repository (This is if you have a local git server, which I recommend). Your clone command may vary depending on how you setup your git server. I use gitolite with ssh authentication.
- MYGIT-SERVER – Is the host name of your git server
- MY-REPO – Is the name of your repository
$ git clone git://github.com/opscode/chef-repo.git
$ cd ./chef-repo
$ git push --mirror git@MYGIT-SERVER:MY-REPO
$ cd ..
$ rm -rf ./chef-repo
$ git clone git@MYGIT-SERVER:MY-REPO
Workstation Setup
Download the omnibus installer. If you are using a unix based OS (including Mac OSX) the following will work from you. If you are running Windows you will need to download the installer from Opscode.
$ curl -L http://www.opscode.com/chef/install.sh | sudo bash
Download the chef-validator.pem file from your server (This would have been generated during your server install), create a .chef directory and move the .pem file to your .chef directory.
$ mkdir ~/.chef
$ mv chef-validator.pem ~/.chef
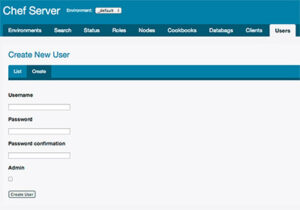
Login to your chef server https://mychefserver.com and create a user for yourself. After the user is created, you will need to copy the private key into a .pem file under your ~/.chef directory.
Copy the private key information and create a .pem file named after your user name
vi ~/.chef/USERNAME.pem
Configuring Knife
Now that we have our repository created as well as our authentication keys we can begin configuring knife. To do this we need to run the knife configure program:
- Please enter the chef server URL: This should be the URL to your Chef server.
- Please enter an existing username or clientname for the API: This should be your username and should match the name of your .pem file.
- Please enter the validation clientname: Leave as default
- Please enter the location of the validation key: This should be the path of your chef-validator.pem
- Please enter the path to a chef repository (or leave blank): This should be the path to the repository we created earlier
$ knife configure

WARNING: No knife configuration file found
Where should I put the config file? [/Users/USERNAME/.chef/knife.rb]
Please enter the chef server URL: [http://localhost:4000] https://chef.domain.com
Please enter an existing username or clientname for the API: [USERNAME]
Please enter the validation clientname: [chef-validator]
Please enter the location of the validation key: [/etc/chef/validation.pem] /Users/USERNAME/.chef/chef-validator.pem
Please enter the path to a chef repository (or leave blank): /PATH/TO/chef-repo
*****
You must place your client key in:
/Users/USERNAME/.chef/USERNAME.pem
Before running commands with Knife!
*****
You must place your validation key in:
/Users/USERNAME/.chef/chef-validator.pem
Before generating instance data with Knife!
*****
Test your configuration
If everything was configured properly we should be able to connect to the server and get a listing of our chef clients.
$ knife client list
You should receive a listing of all of your clients:
chef-validator
chef-webui
client1
client2